Application Setup
- Authors
- Name
- Austin Howard
- Updated on


Table of Contents
Clone
The best way to clone the app for yourself is with degit.
First, install degit globally on your machine.
npm install -g degit
Now use degit to clone the app. This will strip away the git history to get you started with a clean slate.
degit https://github.com/Dorpxr/hugi.git
Create a Github Repository
At this point you could go ahead and create a new empty Github repository, and follow Github's instructions to push the new repository there.
Add Notion Secrets to ENV
In order to get up and running we need to add a local environment variables file and add some new variables.
In your hugi app, you can run the following to create a new file.
touch .env.local
Now add your notion secrets to it.
NOTION_API_KEY=your_notion_api_key
NOTION_DATABASE_ID=your_notion_database_id
Run the App
With your notion secret and database id setup in environment variables, you could start running the application locally and it should pull posts from notion!
Deploy on Vercel
Vercel has a generous free teir that you can get started with. If you don't already have an account, go ahead and create one.
Once you have an account, Vercel makes it extremely easy to deploy your new application. All you need to do is select the repository where you pushed the Hugi app.
Your first deployment will fail because you need to add environment variables to the project.
Copy the contents of your .env.local file, and paste into the key field shown below. This will automatically add all of your environment variables to vercel environments.

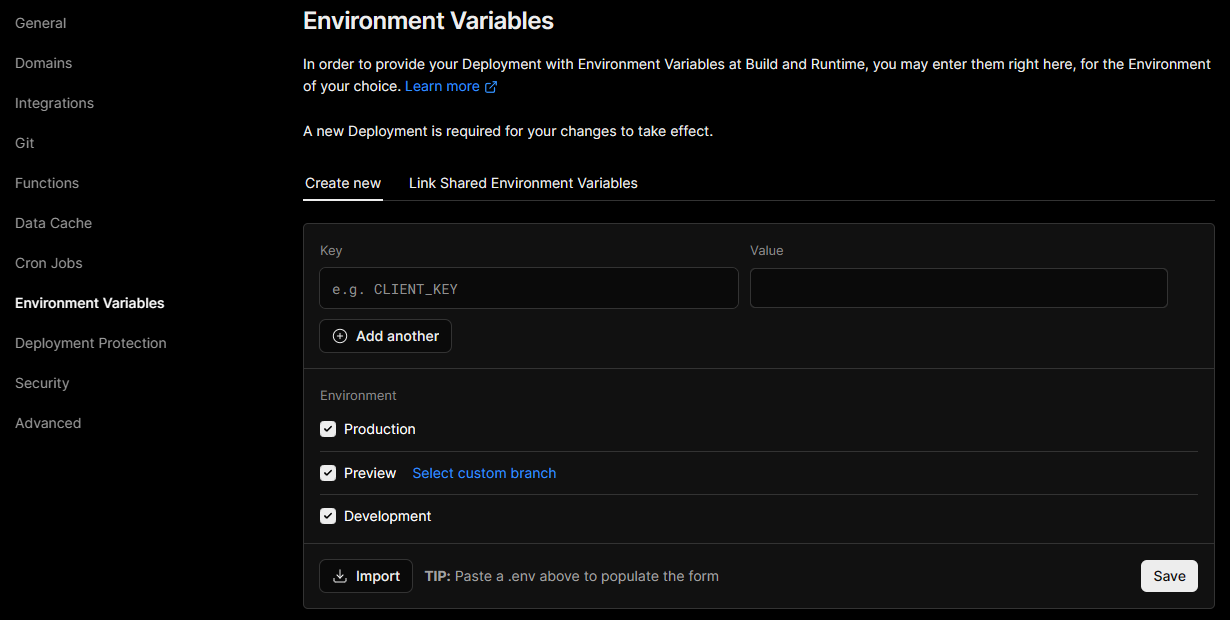
With environment variables added, you can redeploy from Vercel and you should be up and running!
Setup Google Analytics (optional)
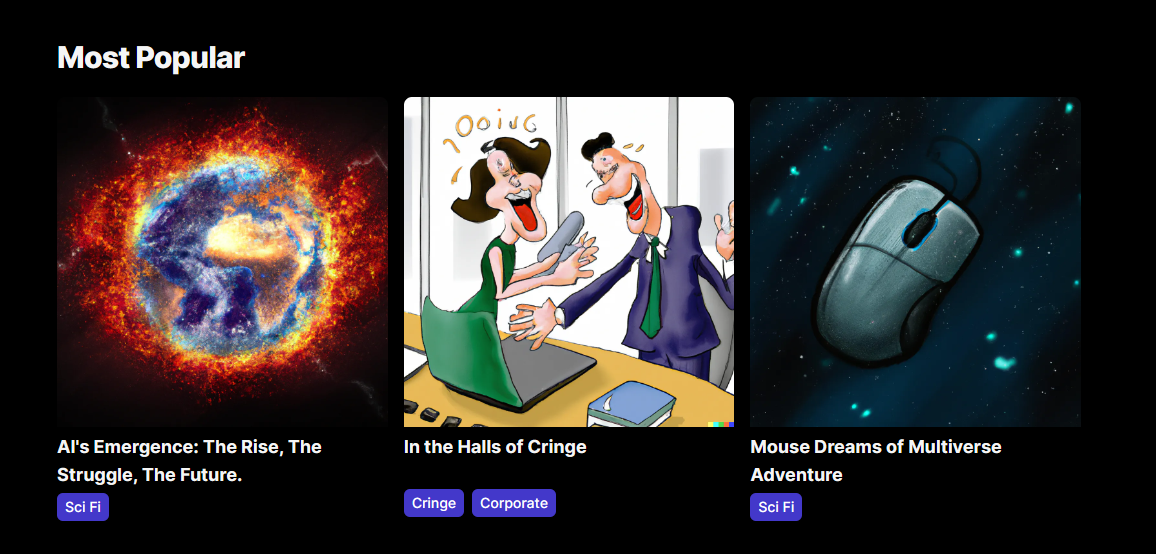
With a Google Analytics Api integration, we can do things like show the user the most popular posts based on page views.
The Hugi app has a Popular Posts Carousel on the home page that does exactly this.

If you simply want to disable this feature, you can modify the featureFlags property in the siteMetadata.js file.
const siteMetadata = {
  // ...
  featureFlags: {
    popularStoriesCarousel: {
      enabled: true, // => false
      // ..
    },
  },
  // ...
}
If you want to take advantage of this feature, continue on through the next steps.
A prerequisite to this step is that you need to create an Analytics Property which first requires creating an Analytics account. You'll then need to set up analytics for your new app.
We created a blog post on How To Use Google Apis with Next JS which you can follow for exact instructions.
We've already setup the client for you, all you need to do is add your Google Analytics Id and Google Analytics Property Id to siteMetadata.js.
const siteMetadata = {
  // ...
  analytics: {
    googleAnalyticsId: 'G-YOUR_ANALYTICS_ID',
    googleAnalyticsPropertyId: 'YOUR_PROPERTY_ID',
  },
  // ...
}
Ensure you have base64 encoded the credentials json file from analytics and set the encoded string as your GOOGLE_APPLICATION_CREDENTIALS environment variable in .env.local.
Configure Popular Stories Date Range
You can configure the range of time by which to get the most popular posts.
By default, the carousel will show the most popular posts in the last 28 days.
const siteMetadata = {
  // ...
  featureFlags: {
    popularStoriesCarousel: {
      // ..
      dateRange: 28, // <--- n days ago
    },
  },
  // ...
}
Setup On-Demand ISR Secret (optional)
The application leverages incremental static regeneration so that pages can still be updated without needing to redeploy the entire site, but all the benefits of static generation are retained.
There are default cache rules applied to the pages such that the content on the page is considered stale after the set revalidate time. After this time on the next request, the page will get regnerated in the background with fresh data from Notion.
Example of home page cache rule:
export const getStaticProps: GetStaticProps<Props> = async () => {
  const [latestStories, popularStories] = await Promise.all([
    getAllPostsFrontMatter(databaseId),
    getPopularStories(),
  ])

  const featuredStory = latestStories.find((story) => story.featured === true)

  return {
    props: { latestStories, featuredStory, popularStories },
    revalidate: DEFAULT_CACHE_CONTROL['24'], // <--- considered stale after 24 hours
  }
}
With on-demand revalidation we can manually bust the cache for any pages whenever we want to.
We've setup everything for you to use this, all you need to do is come up with a secret (your own password) and set it as an environment variable in Vercel.
REVALIDATE_TOKEN=your_made_up_secret
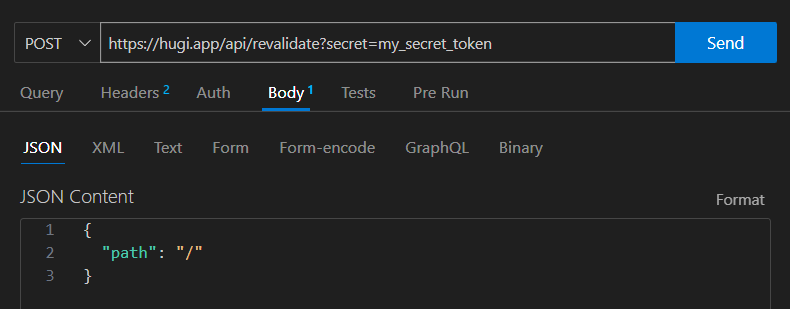
Once you've done this, you can manually bust the cache via curl or a client like Postman or Thunder Client.
Example POST request from Thunder Client to revalidate the home page path:

Insta Links Pages
A fun feature in the application is the insta links that displays only the feature images for each post in an instagram-esque fashion.


If you're planning on create a personal blog or a news feed, this is the perfect page to display in an instagram or facebook bio.